Monday, September 29, 2008

100% BOY

I have this thing with altering clipboards.


I love the makeover like change that results and the way it becomes a piece of wall art. This particular one I made as a special baby gift for my Secret Sister (a prayer group from church.)


All of the paper is so very boyish and all supplies with the exception of the ribbon is form Sandylion. If you look close at the paper you will see that the stamps are actually repeated in the paper's pattern.
My letters are painted and stamped and adhered with a hot glue gun.


I think my fave part of this clipboard is the stamped car on the clip itself. Anyways the next clipboard project is one for my favorite niece and nephew!

Friday, September 26, 2008

Birthday Tin

For my husband's 30th birthday I really wanted something special. But as it seems to to have gone in the last year, all of those special holidays and birthdays come and go with us being relatively "penniless" SO the trick is to create something personal with a heartfelt message using things I already have. Now I realize that these kinds of things are really not up my husband's alley but it makes me feel like I have at least given him something for his special day. Using a CD tin I used different papers from Basic Grey's Scarlet' Letter line, some self adhesive rhinestones, a sharpie marker and an adhesive that is near impossible to remove. The back side is covered with 30 different things I love about my special man. The bottom stamped image is from FontWerks. I used Staz-On ink for all of my stamping. The red metal embellishments are from my local scrap shoppe. Inside the tin I glued another smaller tin. This mini tin contains an accordion scrapbook. My birthday message is written directly on the tin using a fine tip Sharpie marker.I want to use this mini as an opportunity to consciously remember to take photographs of my hubby and I together. On a recent hunt for these type of pictures I found next to none! How awful! LOL On the opposite side I placed a pic of me. The background papers are once again from BG's Scarlet Letter.

Saturday, August 16, 2008

Taylored Expressions Cupcake Challenge #29

This weeks Cupcake challenge was a fun one for me. I viewed Taylor's featured cupcake sampler, Noelle's card and I loved her take on Cupcake 101. As a springboard from her card I immediately went to this idea: What makes a cupcake? It's all the little things put together...the frosting the cake itself the sprinkles and thus my card was born. On the right are three delicious whole cupcakes(featured again int eh the focal center circle) and the remaining are those bits and pieces that together make up the whole cupcake, I started with a textured blue car stock from my Colorbok stash as my base. From there I used up a bunch of scraps from Basic my Grey collection(this time all from the Dasher line). The cupcake stamps are cut from different Inkadinkadoo stamps and frosted with white Liquid Applique and topped with Stickles "sprinkles". I didn't have a circle punch small enough so I used my Fiskars template and shape cutter to get my circles and drew by hand the scallops around each feature. I love highlighting a certain something in my cards and this time chose to place my center circle on dimensional foam. Thanks for coming by, I hope you play along this weekend...remember to check out Taylor's blog for further details! Blessings to you on this beautiful weekend.

Sketch Challenge "mytimess1"

I enjoy visiting Lauren Meader's blog at My Time...(see my blog roll to the right). She always has such a amazing creations! Her cards and other works of art are super professional in appearance and are one of a kind. On Saturdays she has a sketch that anyone can join in - so here is my interpretation of her sketch. As you can see I flipped the sketch for my needs. The card stock is from my Colorblok stash from Walmart and the patterned paper is yes, that's right, Basic Grey's Wonderland from the Blitzen line. I used my Whale of a punch for the squares and the Marvy Scalloped punch. My butterflies were inked and embossed and come from Inkadinkadoo. I pierced a trail for the butterfly using a sewing needle and finished it off with Peace using my October Afternoon letter stamps. I distressed the edges of the card a touch to give it some fuzziness and used dimensional foam for the squares to raise them up. Although the card is for a sad occasion I am happy with the way it turned out. Double click on the pics for a better view. Blessings to you!

Friday, August 15, 2008

It's a Boy!

I am totally in love with this gentle lion. How cute is he! This was an impulse purchase at my local Buck or Two store and I have to tell you I was apprehensive about buying stamps form them. Quality and all you know. But for $8 I got a huge assortment of the cutest "boysie" stamps. They are a Sandylion brand and I'll tell you a secret I bought the girlie version today from them. Anyways back to the card. I needed something super sweet for my newest nephew who is absolutely adorable, plus I wanted to use some new papers and stuff and wow, this for once turned out like I imagined it would. So I started out with some baby blue card stock from my Colorblok stash. I really like this paper for two reasons: 1. I got a fantastic deal on it at Walmart and 2. It has a beautiful texture on one side. The patterned papers are form Nans Nursery paper blok...which is a fantastic deal! Some ware shimmered and textured and all coordinate beautifully with each other. The ribbon is from my Costco stash it has an adhesive backing which makes it great for flat uses. The buttons are from my Dollarama stash and the stamped sentiment is from Autumn Leaves (Rhonna Farrer: Baby) I used my favorite Staz On ink for stamping and that is pretty much the details on the card. I think this is my new favorite card. Now to actually make sure I give it to my Bro/Sis in law!


Another Year of VBS is Done

VBS is done for another year and it was a great success! The following pics are a brief overview of the event, and yes I know they are unedited but it was this or nothing :) Maybe next week there will be some more time...oh who am I kidding! Have a great day, blessings to you!


Thursday, August 14, 2008

Zoomazing Bible Adventures

VBS has been going great! We have had some professions of faith and the children are loving the theme and the songs and everything it seems. It has been a lot of fun. Here's a couple of pics of the theme.All the children were divided into 2 groups - boys and girls and by age. SO all the 4 &5 year olds were the puppies, the 9 & 10 boys were giraffes and the 11 & 12 girls were the Pandas etc... You can see some of the hats here. I love the giraffes!
The fellowship hall was decorated so well this year! We had a museum quality display of some different animals and lots of other interesting things that really set the mood.
Blessings to you today!


Tuesday, August 12, 2008

Busy, Busy Week!

This coming week is going to be monster busy! And today I so feel the need to take a week off from everything and just sleep, relax and actually take a time off so that you actually find yourself getting bored and looking for something to do. I'm not sure if i even remember the meaning of the word bored.

This week, like usual, is full of church activities and things to do. We have our annual VBS starting tonight and I am leading the singing again. I enjoy it so much, hence why I do a weekly Children's Choir. But believe it or not I find this type of ministry to be draining! Keeping the attention of all those children means you have to be vibrant, exciting, over the top and quick to switch things around and improvise. This is especially difficult when you are are tired and crabby. But it seems that God blesses my heart so tremendously that I would be loath to give any of it up.

This years VBS theme is Zoomazing Bible Adventures. The theme song is super catchy and I love the variation I came up with for If You're Happy and You Know It. Maybe that will be tomorrows post.

So the above means that there will be little time for any type of crafting this week. (I have made some wonderful photo collages that I am needing to get printed out and am very excited about scrapbooking those.)

So off to home, a quick shower because it is soooo humid here and then VBS; please pray for lots of children to come and for their hearts to be tender and open as well as for me as I lead the girls side in singing. Blessings to you!

Saturday, August 9, 2008

Taylored Expressions Cupcake Challenge #28


This is my second week of joining in at Taylored Expressions. She hosts great sketch challenges and I have found it is a good way for me to grow as a paper crafter. So here we are; my second submission.
Here in this picture you can see the items I pulled to create my card. But to no surprise some things change as the creating process goes on.. I once again played with my Liquid Applique, this time in pink. I propped up everything on foam. My two favorite things on this card is the the "Bubble" paper on the bottom third from Nana's Nursery Baby Boy pack. I love the subtle shimmer and slightly irregular circles. The other favorite would be the ribbon! A super deal that I found at Dollarama, it's a nice quality and I love the colours! I love joining in on these challenges why don't you do the same, here's a blurb form Taylor's blog with the details:

Now it's your turn to try the sketch! I'll chose the most clever, creative, and cute creation from the submissions this weekend to be the Featured Cupcake Sampler next week. Your design and blog will be featured on my blog during Cupcake Friday. One random winner will also be selected from among all the participants to receive a package of Stampendous chipboard clipboards! You're not required to use cupcakes for the
challenge, but if you got 'em why not use 'em!? :) You're welcome to create something other than a card, just stick as closely to the sketch as possible and you'll be eligible for the prize drawing and Featured Cupcake Sampler honors. If you're uploading to Splitcoast use keyword TECC28 (for Taylored Expressions Cupcake Challenge 28). Leave a comment on this post with a link to your blog post or gallery upload so I can check it out! You must have your cards uploaded by Monday, August 11th at 8am PST to be eligible for the prize drawing.

My Prince Chipboard Card

Every girl needs a Prince Charming and I certainly married mine 4 1/2 years ago. To celebrate his birthday I recruited his Dad to help me with his gift. This is one of the only times I was able to surprise him with a birthday gift! What did I get him you ask? Well he always talked about what a shame it was that there weren't enough Canadian flags flying in our town and that one day he was going to put up a huge flagpole in front of our house. So I beat him to it and had a flagpole made and bought all the rest of the stuff and viola! A birthday gift that for once was a surprise. So now that you know all of the history here is the card that I made for my Beloved. I used chipboard as the base and covered it in Basic Grey papers. I absolutely love these papers (as you already know) for use on masculine cards and gifts. Because you can't really frill up a manly card these papers have enough punch to them to be gorgeous on their own. Yet at the same time you can do beautiful girly things to them as well. The monogram "P" is a Heidi Swapp chipboard letter that I covered in coordinating paper form my Basic Grey collection. The metal charm was in my stash that I know I bought at my LSS but have no clue who it came from anymore. We all know that a card with out a ribbon barely qualifies so here out of respect for the masculine intended I substituted BG paper. The closure is an old button from my sewing stash and I used a leather string from a jewellery making experience as the tie. Inside I created my own embellishments using chipboard and metal. and used a transparency to type out my birthday wishes. This was one of first experiences in working with chipboard and I must say I loved it and have been hooked ever since. Blessings to you!

Friday, August 8, 2008

Mini Clipboard

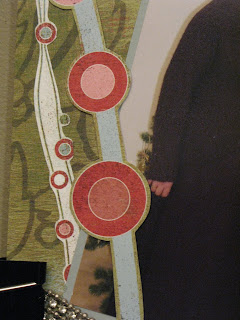
I love these mini clipboards! They are fantastic for taking to work. Especially if you are in a cubicle style office and space is at a premium. This is the perfect solution for having a photo displayed in this setting. And because it is a clipboard you can update your pic so very easily at any time. This particular clipboard I have covered in BG's Dasher line of papers. By the way this line creates beautiful Christmas cards.I wanted to keep this clipboard looking a cross between "office drudgery" and "good times". Therefore I used those office clippies again to use in not holding my pics more securely but to add a splash of colour and dimension. The embellishment at the bottom is actually an old bracelet of mine that tarnished. It has two strings of rhinestones that still glitter beautiful but contrast the "drudgery" look of the remaining strands. My tag is simply adhered to the clip using an ethereal ,gossamer piece of ribbon (it's from my wedding bouquet) I think my favorite part about this clipboard is the run of circles on the left hand side. It's adhered strategically so that you can slip a photos underneath in some spots. The circles are actually cut out form one of the papers I had in my Dasher stash. What are some of your favorite clipboard creations? What do you create them for? Enjoy your weekend, blessings to you!

Thursday, August 7, 2008

Scarlet's Love Letter


I needed a card for Valentines Day for my husband...these I find difficult. I want it to be lovey-dovey but it's still for a man and needs to stay away from "sugar and spice and all that's nice..." So I compromised and really loved the card. It was quite simple to boot!

I started with a black card stock and turned to my all time favorite paper - Scarlet's Letter(Basic Grey). Used a corner rounder on everything and adhered. I covered the seam with ribbon - but no bows! Instead to give it some dimension I used a foam double sided tape for the ribbon. It actually sits 1/8" high. The rub ons were a freebie I won at a crop and work fantastic! They are in French and rub on beautifully. They are from Accent Scrapbooking, I believe it is a primarily French line of product.

The inside was the same red paper inside with another rub on from Accent Scrapbooking and that was it. Easy as pie.
Except I can't make pie so ...
Blessings to you today!

P.S. Sorry about this post quality..I am having problems :(

Tuesday, August 5, 2008

A "Whiteboard " Clipboard

For a long time I was without a camera of my own. Long story short is that it died after borrowing it out, never to be replaced again until visa points were accumulated! So in that time of sadness and mourning I started creating a lot of altered art using all of my favorite scrapbook items. This legal sized clipboard was one of them.

I picked it up for a couple of dollars at my local Buck or Two store - as well as a few mini clipboards and other such items. This particular one I created for my sister as a gift for some reason or another...can't remember! As you can see in the picture I once again used my all time favorite paper: the Scarlet's Letter from Basic Grey. Because of the size of the clipboard I was short 2" on paper and was having a difficult time deciding what to cover those 2" with. I ended up using some card stock that I stamped flourishes on using black and gold. This helped to blend the two better.

Next step was to attach my ribbon. I didn't like the way the seam looked where my patterned paper ended and the card stock started. This particular ribbon I received as a gift through my church's Secret Sister program. I found out later it was from Costco (Cdn version of Sam's Club). I chose to use this flat twill here because it has a peel away adhesive on the back. Can't use it to tie a ribbon but it works beautifully for things like this. I wanted this clipboard to be functional as well so I took transparency paper (because who on earth is going to cover that beautiful paper up!) sent it through my printer and using my all time favorite font Scriptina created a whiteboard like layer to keep track of things on. I adhered the transparency in a couple of spots and then went a little nuts with buttons. I really, really, really like them! These were a mixture of buttons I have had forever as well as some from a package I bought from Dollarama. A few were strategically placed to help cover the adhesive...see whiy I love them!

I grabbed an office clip - can not ever remember their real name - and very carefully and slowly applied some rub ons. The end of the clip is on of my fave parts...more buttons! To finish it off I tied a ribbon around the clip and proceeded to carefully wrap it up to give away.

So even though I was cameraless, I was still able to create...just had to think outside the camera! I think this is when I also started making cards. Blessings to you!

Monday, August 4, 2008

Sunshine Blueberry Muffins

These have to be some of the best muffins and they are sooo easy to make! What makes them a little extra special is the Lemon Sugar Topping.If you want the muffins to stay on the healthier side omit the topping.

Sunshine Blueberry Muffins
yield: 12 muffins

1 3/4 cup flour
1/2 cup sugar
2 1/2 tsp baking powder
3/4 tsp salt
1 egg, well beaten
1/3 cup vegetable oil
3/4 cup milk
1 cup fresh blueberries
2 tbsp sugar
grated rind from 1/2 lemon

Topping:
2 tbsp butter, melted
Juice from 1/2 lemon
1/4 cup sugar

1. In large mixing bowl, mix all dry ingredients
2. Combine egg, oil and milk. Add to dry ingredients, stirring just until moistened.
3. Toss blueberries with 2 tbsp sugar and the lemon rind. Fold carefully into batter.
4. Fill greased muffin pan or liners 2/3 full. Bake for 20 minutes at 400.
5. While muffins bake mix butter and lemon juice for topping. Keep sugar in separate bowl. While muffins are still hot dip first into the lemon butter mixture and then in sugar. Enjoy!